 SUPPORT
ℹ️
Use locations for a site structure such as buildings, floors, units, rooms or work zones. Set up the main structure before teams begin recording field work.
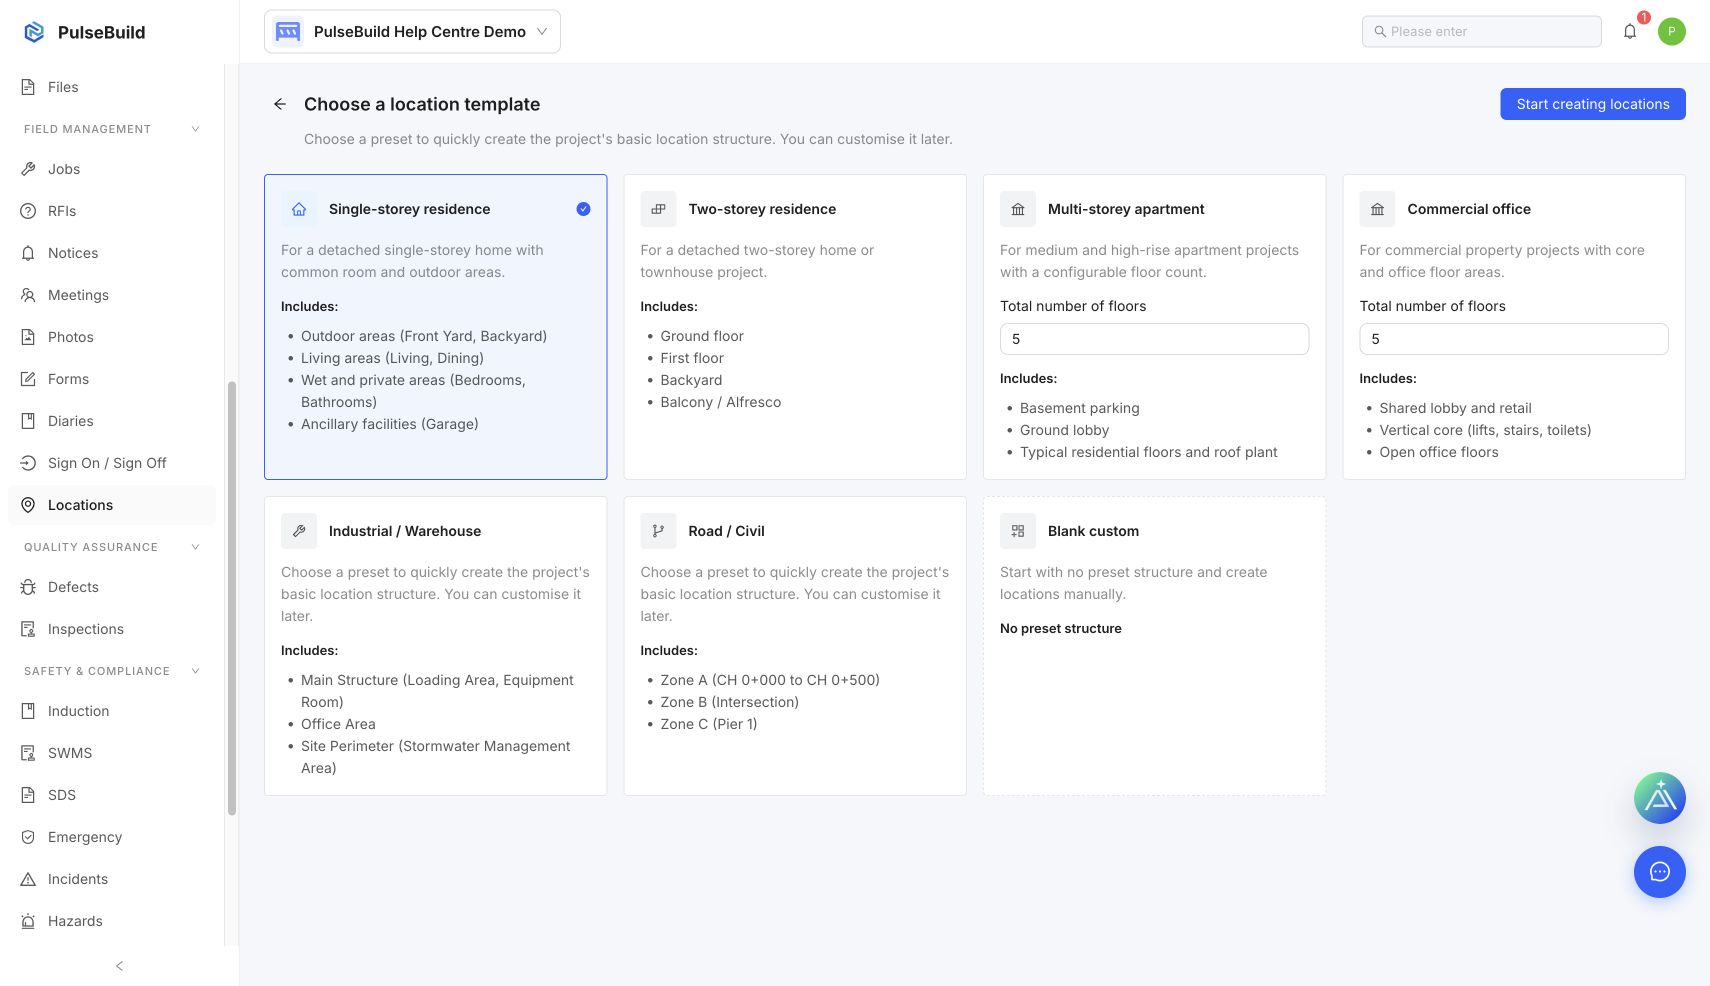
Choose a location template
- Open the project and select Locations under Field Management.
- Choose the preset that best matches the project, or select Blank custom to start without a structure.
- For multi-storey apartment and commercial office templates, set the number of floors.
- Select Start creating locations.
Plan the hierarchy first
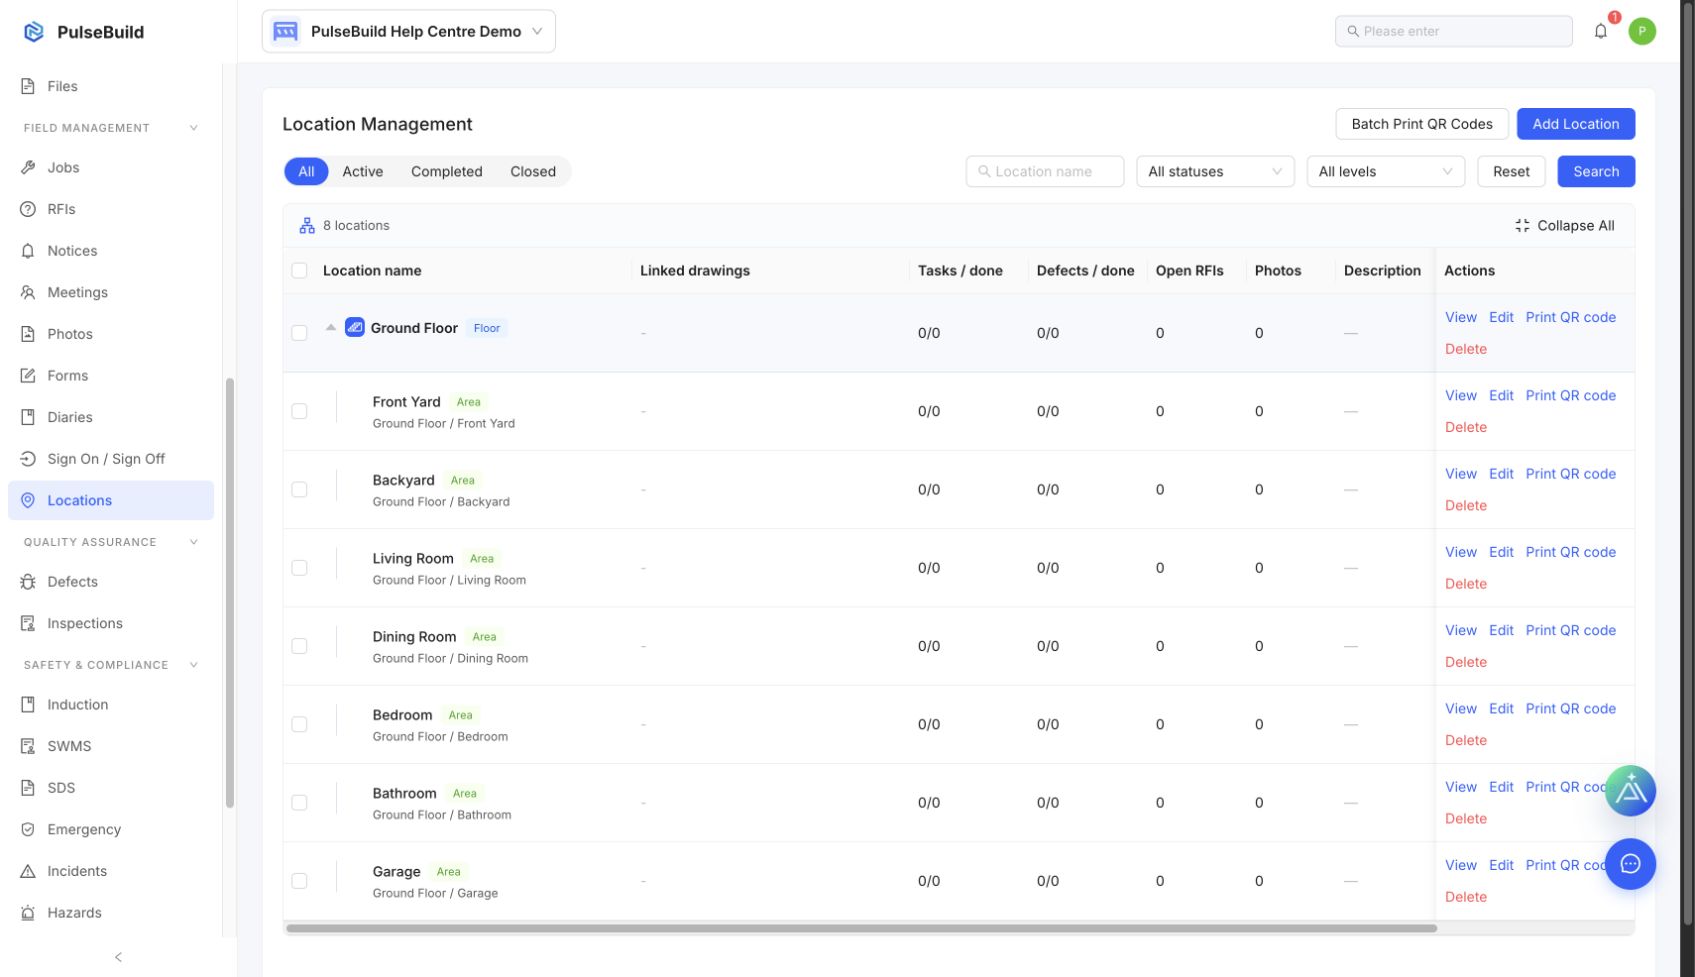
Start with top-level floors, then add areas beneath each floor. For example: Level 1 → Apartment 101 → Kitchen. Keep names consistent so everyone selects the same location.
Create a top-level location
- Open the project and select Locations under Field Management.
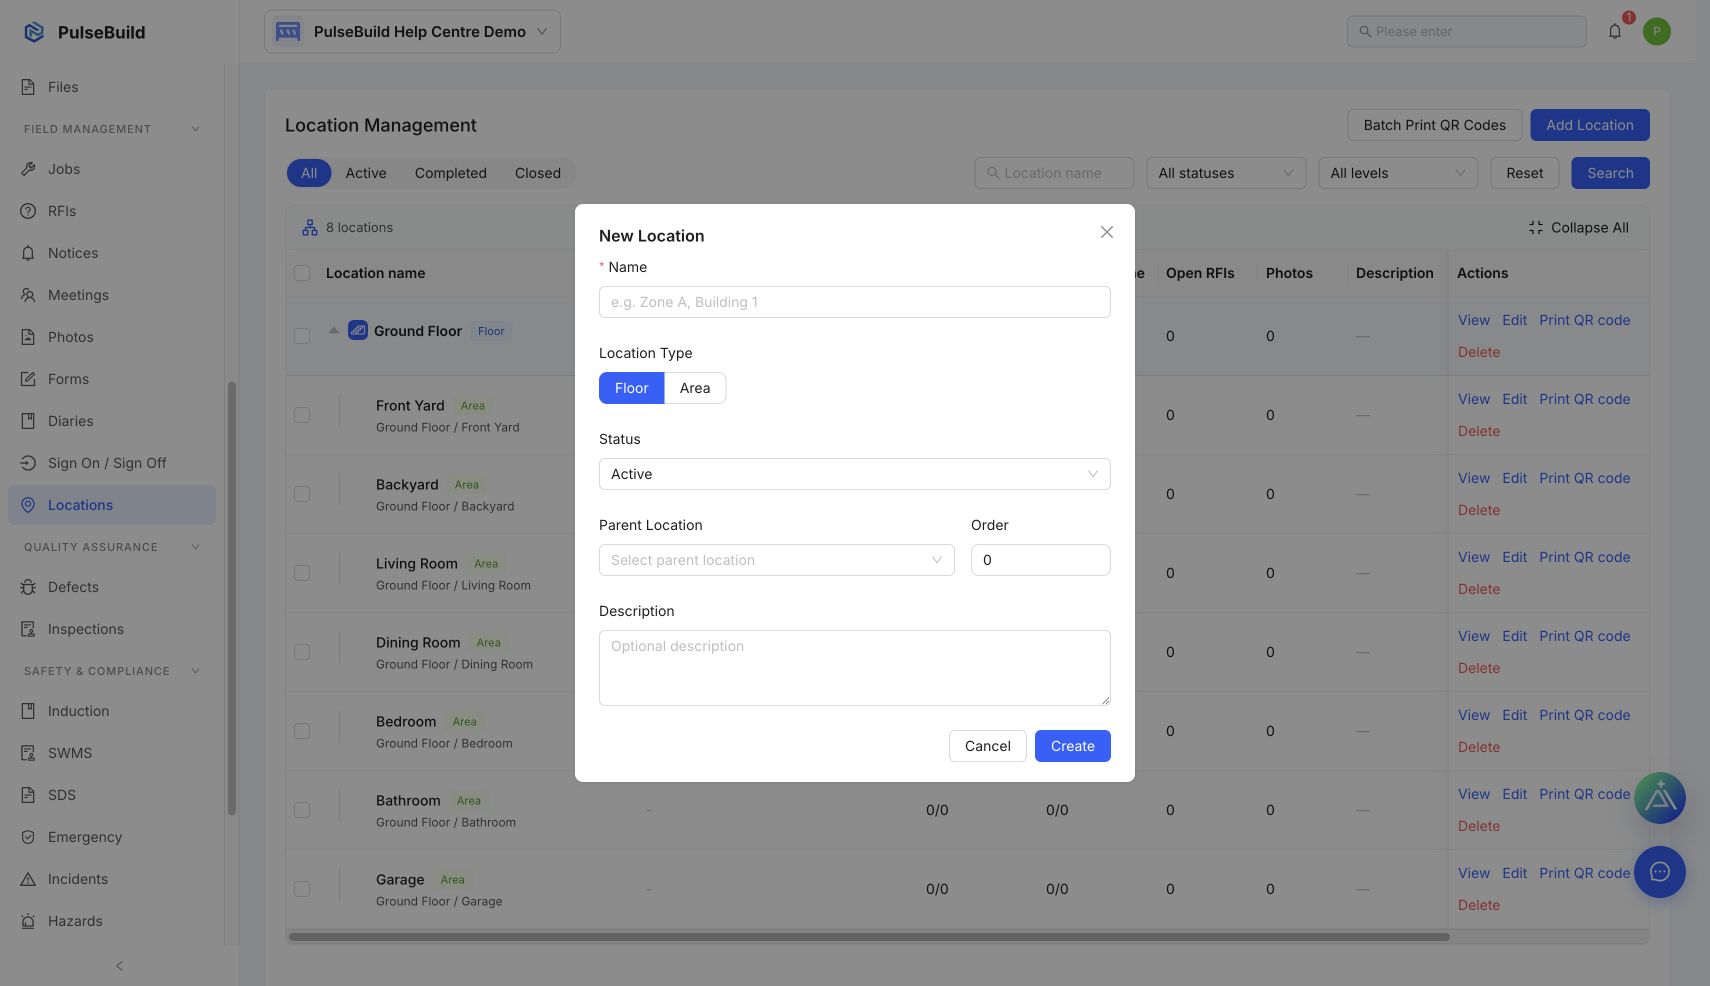
- Select the action to create a location.
- Enter the required Location Name.
- Choose Floor or Area as the location type.
- Set the location status. New locations start as Active.
- Optionally set the display order and add a description.
- Select Create.
Add an area beneath a floor
- From the location list, create a child location for the relevant floor.
- Enter the area name.
- Confirm the parent location. Child locations are recorded as Area locations.
- Select Create.
Maintain the location list
- Use the name, status and level filters to find a location quickly.
- Edit a location when its name, status, order or description changes.
- Only delete an unused location. PulseBuild prevents deletion when a location has child locations or associated project records.
Next steps
Create the first Plan item and assign clear ownership, dates and progress expectations.