 SUPPORT
ℹ️
After onboarding, PulseBuild opens your Project List. Select New Project to start a project workspace.
Before you start
- Prepare the project name and full site address.
- Have the customer name and email address ready. These are required to create the project.
Create the project
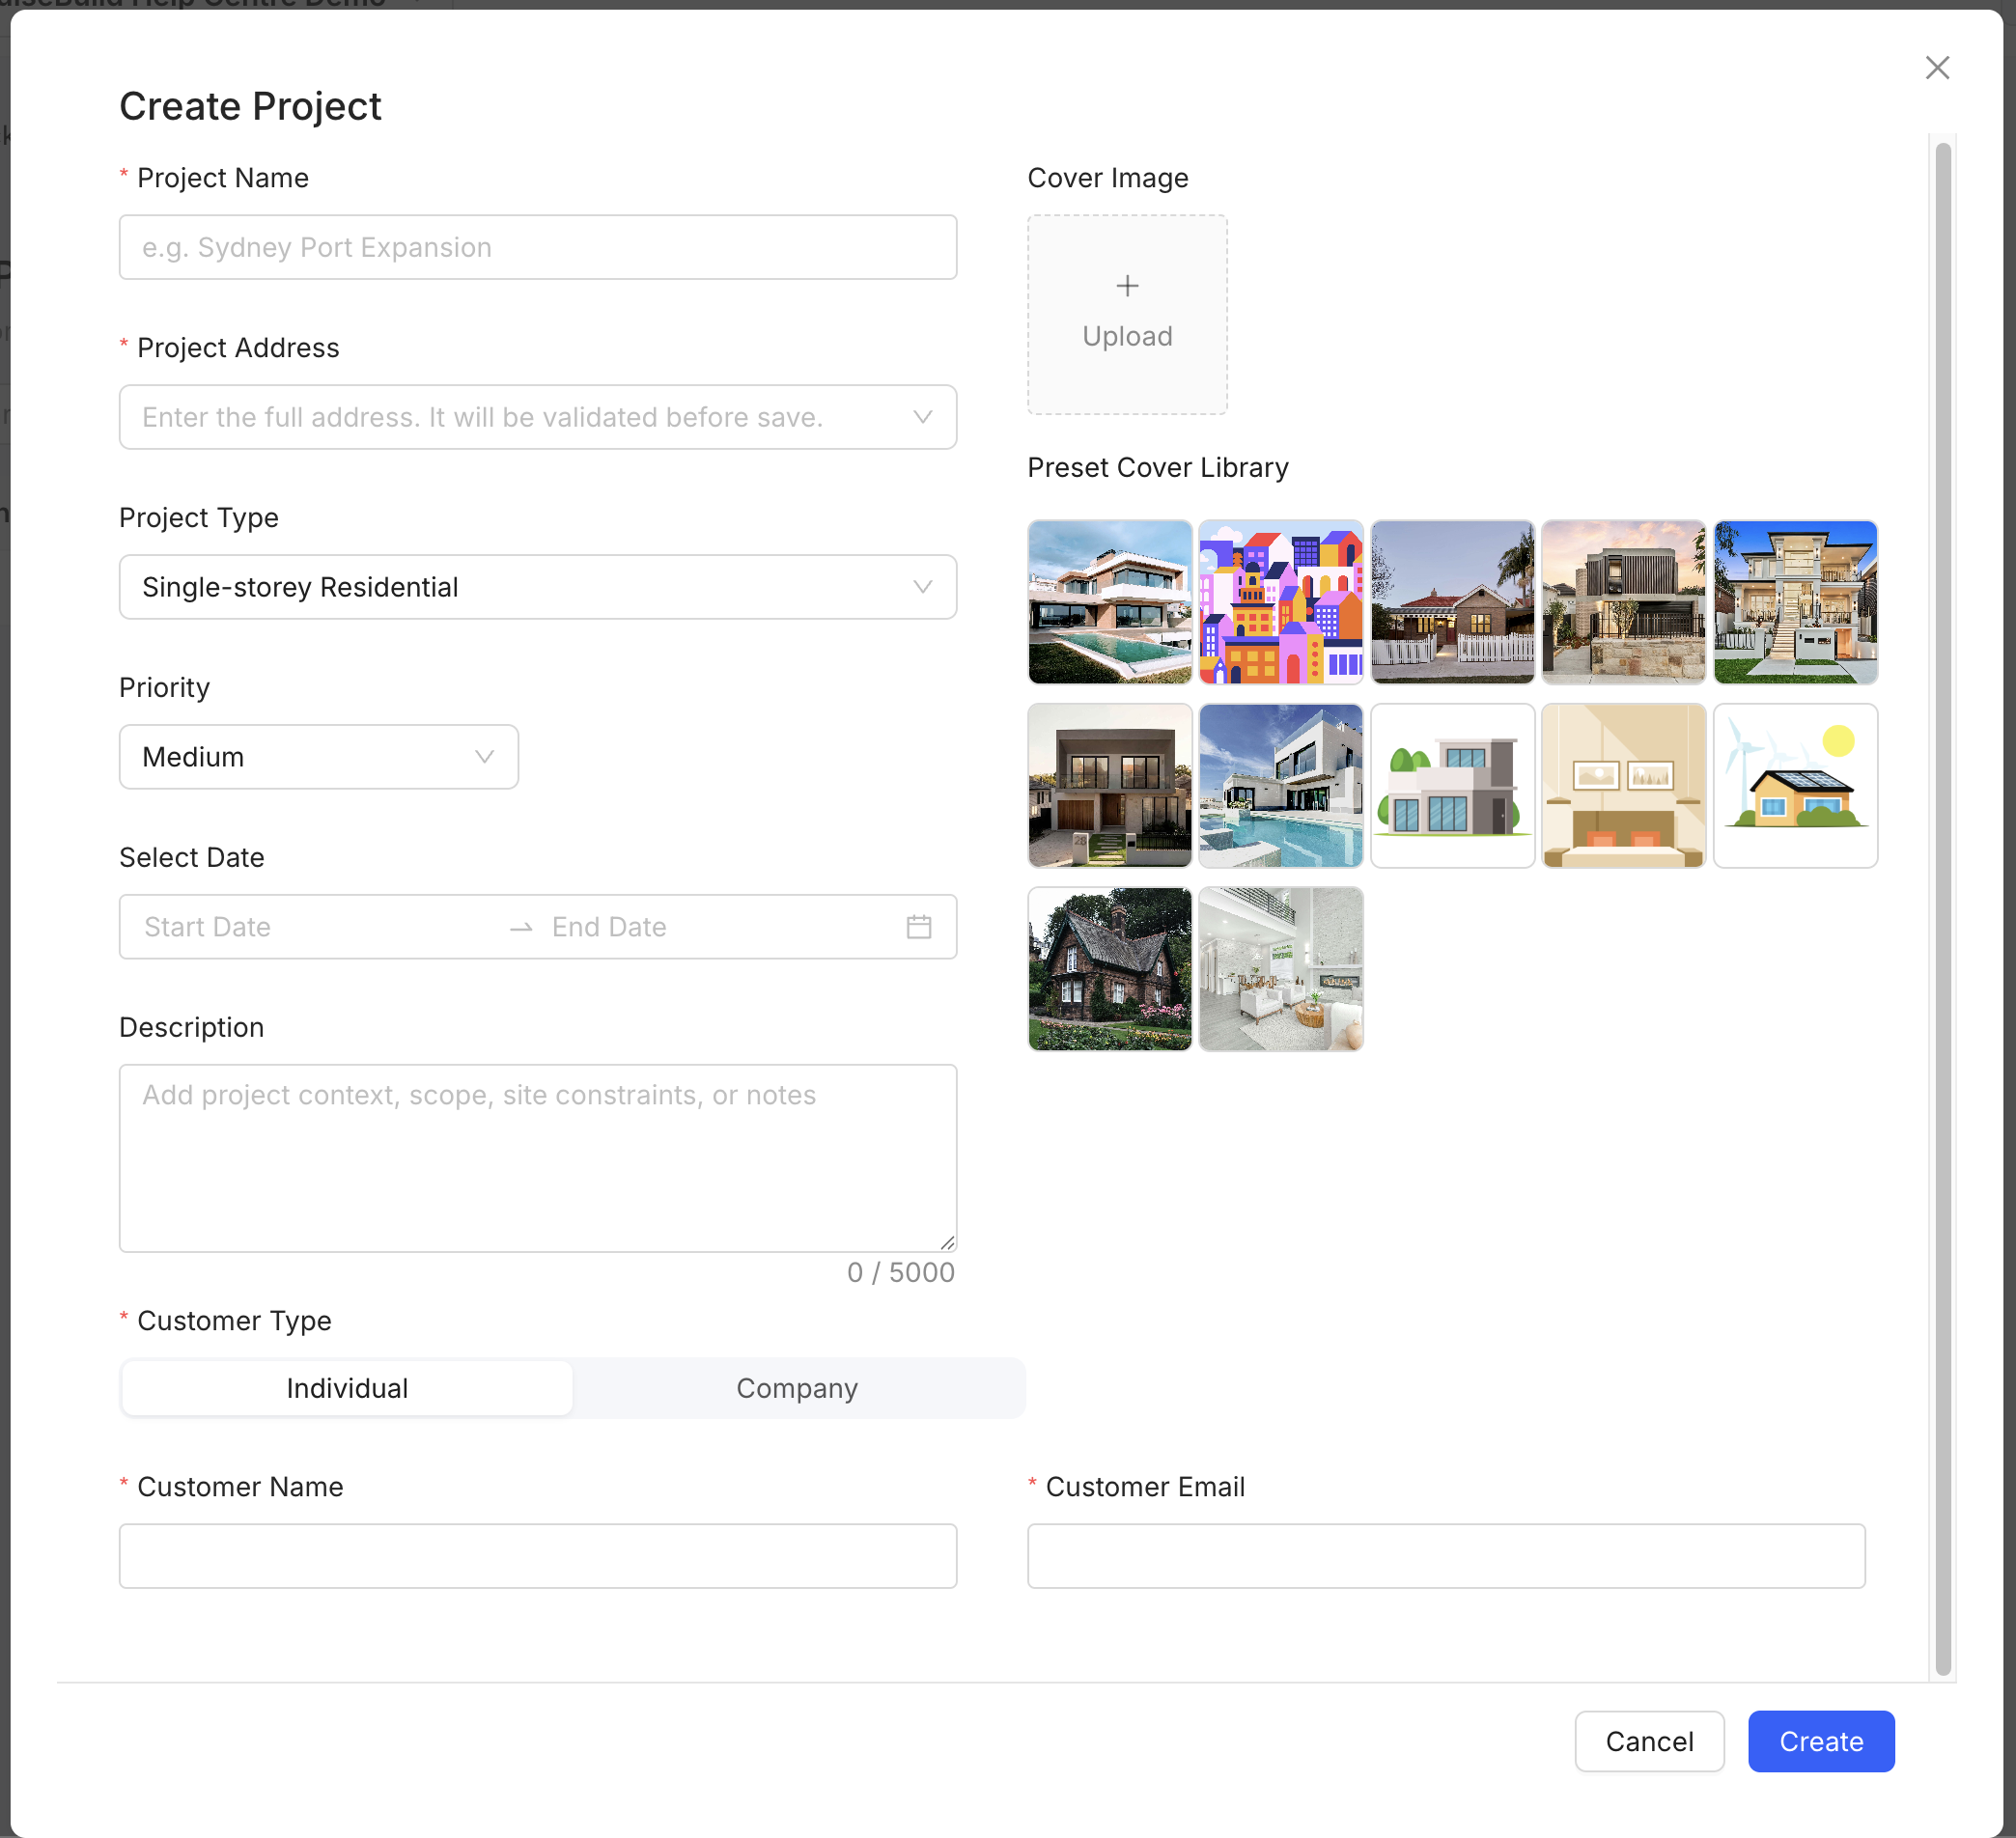
- From the Project List, select New Project.
- Enter the required Project Name.
- Enter the full Project Address. PulseBuild validates the address before saving.
- Review the Project Type and Priority; update them if needed.
- Optionally add dates, a description and a cover image.
- Select Customer Type, then enter the required customer name and email address.
- Select Create.
Expected result
PulseBuild opens the new project overview. The project is selected in the top project switcher, and its navigation becomes available for members, plans, drawings, site management, quality and safety work.
Troubleshooting
- The address cannot be saved: enter the complete site address and select the validated address offered by PulseBuild when available.
- Create is unavailable: confirm all required fields are completed: project name, project address, customer type, customer name and customer email.
- I chose the wrong project type or priority: review the project settings after creation and update the details if your access allows it.
Next steps
Invite project members, set up project locations, and add the first Plan items to begin coordinating work.