 SUPPORT
ℹ️
In the Admin web app, the Plan workspace uses the labels Add Task and Create Task. These tasks are the project’s Plan items.
Before you start
- Decide the short, action-led title for the work.
- Identify the responsible team member and estimated start and end dates.
- Set up project locations first if you want to associate the work with a specific site area.
Create a Plan item
- Open the project and select Plan.
- Select Add Task.
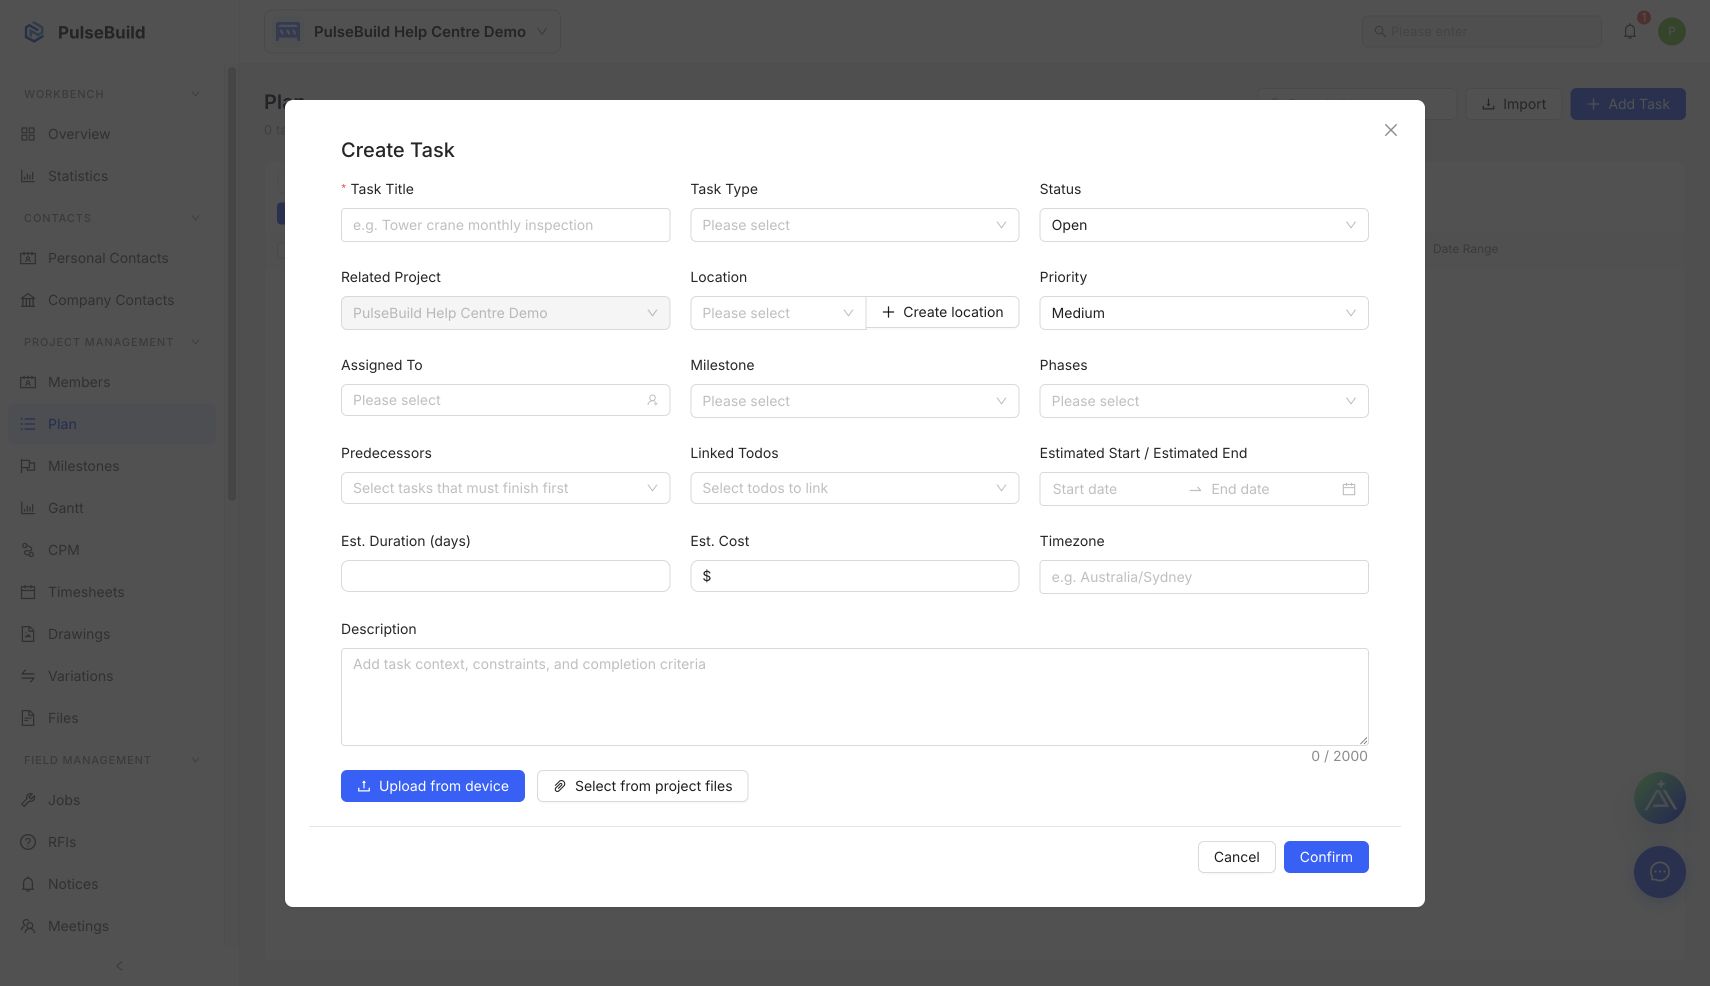
- Enter the required Task Title.
- Optional: add a description with the context, constraints and completion criteria.
- Set the location, priority, status and responsible person as needed.
- In Planning, add the estimated start and end dates. You can also add estimated duration, cost, task type and a milestone.
- Optional: select predecessor tasks that must finish first, link related field to-dos, and attach supporting files.
- Select Confirm to create the Plan item.
Review and manage the plan
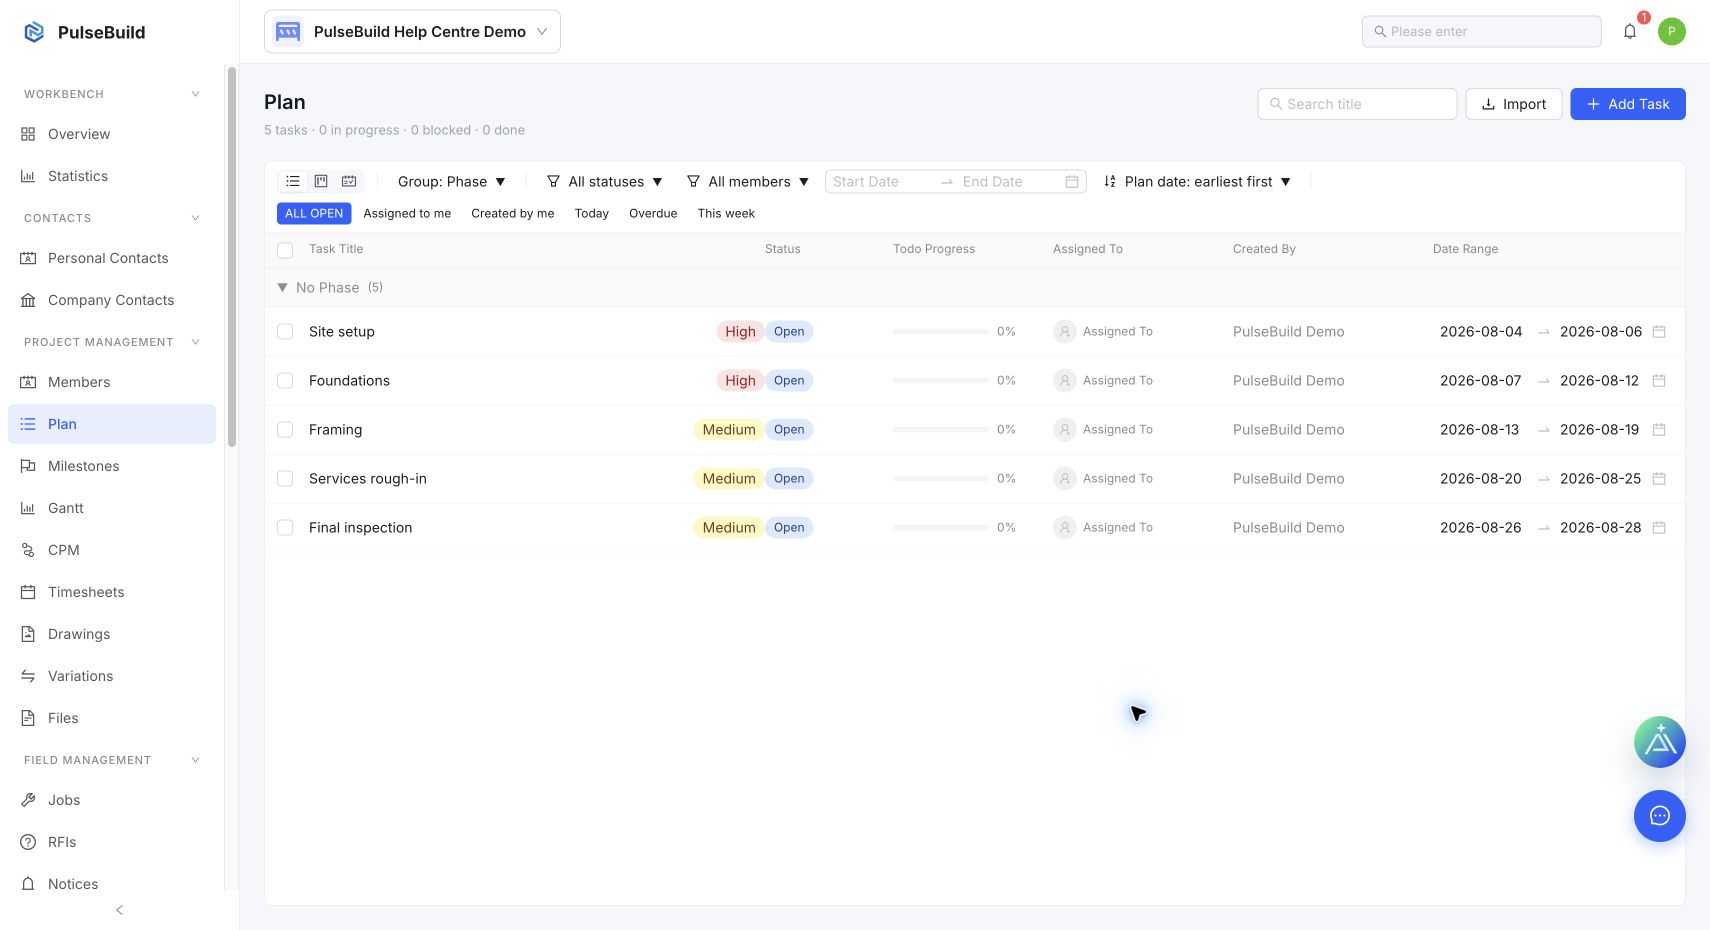
Use the List, Kanban and Gantt views to review your plan from different perspectives. Search by task title, group items by status, assignee, due date or milestone, and update a task as the work progresses.
Troubleshooting
- I cannot create a Plan item: confirm you have permission to create project Plan tasks and that the task title is filled in.
- I cannot assign a person: invite that person to the project first, then reopen the Plan item.
- The location is missing: create or activate the location in Field Management → Locations, then return to the Plan item.
Next steps
Add more Plan items, define dependencies where sequence matters, and link field work back to the planned tasks.